|
Running a program on the HP-67 is basically having the calculator press keys for you. Coupled with the ability to use results, conditions, counters and flags to decide on the program flow, quite sophisticated programs can be written for this machine.
Because a few years may have passed since you last wrote a program for the HP-67, here's a quick rundown on some of the most important features.
Registers
25 registers are available: R0..R9, RS0..RS9, RA..RE, and I. The operation CL REG stores zero in all of them, except the secondary registers RS0..RS9. To access the secondary registers, swap them with the primary registers R0..R9 using the P≷S command. RS4..RS9 are used by statistical functions.
Register arithmetic works only with the STO key. For example, you can multiply the display value into register 3 like this: STO × 3.
Register I may be used to indirectly address all registers. For example, store a positive or negative number whose integer part is 14 in register I. RCL (i) would then retrieve the value stored in RS4.
Another use for I is counting and branching. The instructions ISZ and DSZ increment or decrement the value in I. If the integer part of the result is zero, the next program instruction is skipped, otherwise it is executed. This works even with indirection. In the example above, ISZ (i) would increment the value in RS4 and branch according to the result.
Labels
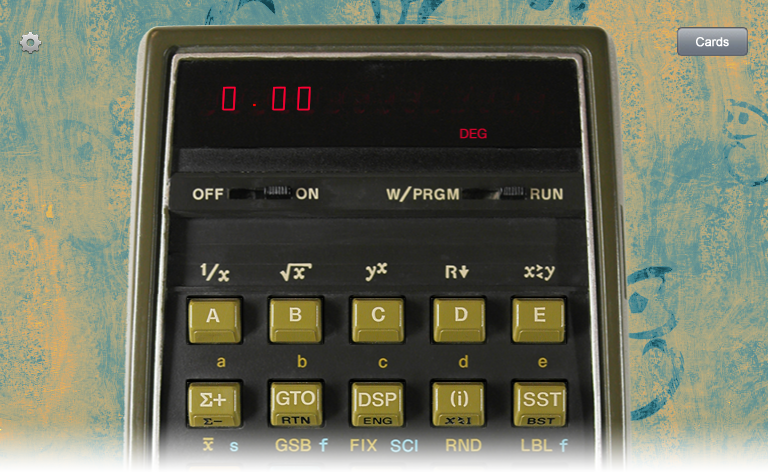
Labels are places in the program where the program flow can branch to (using GTO or GSB commands). 20 labels may be distinguished: A..E, a..e, and 0..9. The alphabetic labels may be easily called by the user by simply pressing the user-definable keys in the top row. With no program stored in the calculator, keys A..E execute default functions like inverse of x or square root of x.
Numeric labels may be indirectly addressed. For example, if the integer part of register I is 7, GSB (i) would execute the subroutine labeled 7.
Interestingly, any label may occur many times in a single program. This works because branching to a label follows a simple rule: the label address to use is always the next occurrence of the label, starting at the current program position. The search wraps around program memory, that is, if the label is not found before the last possible address, the search continues from address one.
Flags, Conditionals
Flags may be used for making branching decisions. There are four flags available: F0, F1, F2, F3. Flags may be set, cleared, or tested. When testing a flag, if it is set, the instruction following the test is executed, otherwise it's skipped. You can set a flag with SF n (where n is the flag number), clear a flag with CF n, and test a flag with F? n (these commands are located on the front of the arithmetic function keys -, + and x, respectively.)
Flags F2 and F3 are cleared automatically just by testing them. In addition, F3 is automatically set when the user enters a digit. F3 is also set when reading data from a data card.
Conditionals x = 0, x = y etc. compare the x-value either with 0 or y. If the condition is true, the instruction following the test is executed, otherwise it's skipped.
Branching
GTO label and GSB label cause the calculator to search downward through program memory until "label" is found, then continue execution from there. In addition, GSB places the address following the GSB command on the program stack (not to be confused with the register stack). The next RTN command encountered will retrieve this address, and program execution will continue there. You can see the current return address on the stack in the register view of RPN-67 (labeled TOS - Top of Stack). If the address is 000, the program will stop after executing RTN. The program stack can hold up to eight return addresses (four if Enhanced Calculator is turned off.)
GTO .nnn sets the calculator to step nnn of program memory. This is true in both Program Mode and Run Mode.
GTO (i) and GSB (i) transfer execution to the label defined in register I, as follows:
0..9: label 0..9 — 10..14: label A..E — 15..19: label a..e
With -1 through -999 in register I, GTO (i) or GSB (i) transfer execution back by the number of steps stored in I (with wrap-around). Called "Rapid Reverse Branching" by HP.
In Run Mode, RTN selects the top of program memory (step 000).
W/DATA, MERGE
W/DATA allows you to store all 25 storage registers on a data card. After executing W/DATA, "Crd" appears in the display. Tap "Cards", create or select an unprotected data card and tap "Write Card".
MERGE allows you to load a program or data card while preserving some of the existing content.
To merge a program:
Use GTO.nnn to set the calculator to the last step you want to preserve (nnn). Execute MERGE (an indicator starts blinking) and load the card to be merged.
To merge register data:
Store in register I the number of the last register to be loaded from the data card (0..25). Load the data card. Data will be stored in registers R0 up to and including the register specified in I.
Note that on RPN-67/97, a pending merge command times out after three minutes, except when the prompt sound has been disabled using Extra Function #–1 "Merge Sound Control" (see Extensions).
PAUSE, REG, -x-, STK
PAUSE stops program execution and transfers control to the user for 1 second, then resumes program execution. Each keypress extends the pause by another second. RPN-67 lets you select additional pause lengths of 2 or 5 seconds.
REG allows you to see the values in registers R0..R9, RA..RE, and I in the calculator's display. Hit any key to stop. If the printer is turned on, the values are printed instead.
STK shows the content of the four stack registers on the calculator's display. Tap any key to quickly advance to the next stack register. Tap and hold any key to freeze the display. (If you do that while a program is running, execution will stop after the STK command has finished.) If the printer is turned on, the values are printed instead.
-x- shows the value of stack register X for five seconds, with the decimal blinking slowly. Tap any key to end this mode (and stop program execution, if a program is running.) If the printer is turned on, the display value is printed instead and no pausing occurs.
HP-67 Quick Reference Card 
Better Programming on the HP-67/97
|
| |
|
|
Storing your program on a card |
| |
|
|
|
| |
|
|
To prepare an empty card for a new program:
Set the mode switch to RUN.
-OR-
To store the program in the calculator on a new card:
Set the mode switch to W/PRGM.
Tap the "Cards" button. |
| |
|
|
 |
| |
|
|
|
| |
|
|
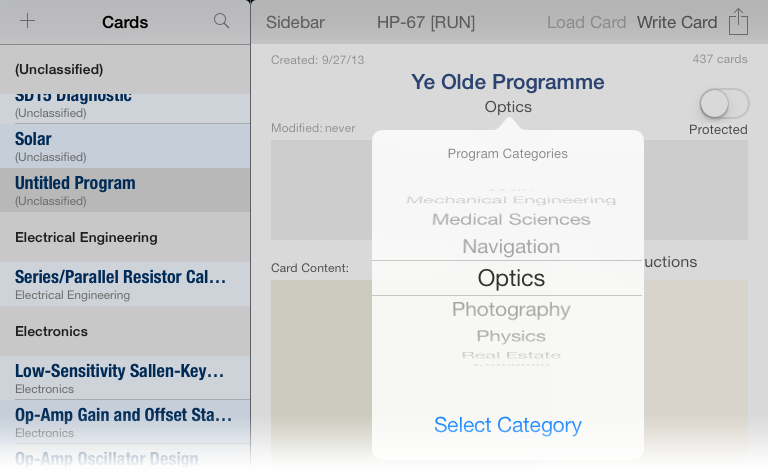
Tap the "+" button.
Specify Card Type "Program". |
| |
|
|
 |
| |
|
|
|
| |
|
|
Tap on the title and change it.
(Optional) Select a category. |
| |
|
|
 |
| |
|
|
|
| |
|
|
(Optional) Add more meta data (instructions, labels).
Tap on the red "Write Card" button. |
| |
|
|
 |
| |
|
|
|
| |
|
|
When you're done (for the moment),
tap the blue "Load Card" button. |
| |
|
|
 |
| |
|
|
|
| |
|
|
Make sure the mode switch is set to W/PRGM.
Enter or modify your program.
When done (or at any time), tap "Cards". |
| |
|
|
 |
| |
|
|
|
| |
|
|
Verify the program listing.
Tap "Write Card" to save any changes.
Tap "Load Card". |
| |
|
|
 |
| |
|
|
|
| |
|
|
Continue changing your program.
-OR-
Slide the mode switch to RUN to use it. |
|
