Operation Modes of RPN-65 Pro


RPN-65 Pro supports four modes of operation which may be selected in "Settings".


Select any of the "Enhancements" listed below.


Off


RPN-65 simulates a real HP-65 as closely as possible. See HP-65 Peculiarities


  • Set to y² on rect-to-polar conversion
  • Set to tan y on polar-to-rect conversion
  • Set to x value on comparisons
  • Set to tan x on sin
  • Set to 0 on arc sin
  • Set to cot x on cos
  • Set to 0 on arc cos
  • Set to 0 on tan
  • Set to 0 on arc tan


Fast


Same as "Off", except execution speed is not slowed down to HP-65 speed.


UI


Same as "Fast", but with several User Interface enhancements added.


  • Print space (blank line): f⁻¹ SPC
  • Print stack: f⁻¹ STK
  • Print registers: f⁻¹ REG
  • Print program: f⁻¹ PRGM
  • Print labels and flags: f⁻¹ LBL


Plus


In this mode, RPN-65 Pro acts like a much improved HP-65.
Existing programs will run in most cases. Programs making use of
(possibly undocumented) peculiarities of the HP-65 may behave differently.

In addition to all features of "Fast" mode, you get:


  • • Flag 1 and Flag 2
  • • Display mode
  • • Trigonometric mode


NOTES
- Loading a Plus card will automatically set the calculator to Plus mode
- Leaving Plus mode with Plus card inserted will eject the card
- Convert Plus cards to standard cards(or vice versa) by duplicating the card
- If not in Plus mode, underflow will halt a running program. Tap R/S to continue.


111 Additional Registers


In addition to the HP-65's regular 9 registers, you may use R0, registers A..E and a..e, and registers 00 through 99.
Full store and recall register arithmetic is supported.

Extended registers may be accessed just like regular registers by prepending their address with a decimal point.

Examples:
RCL f D Get value of lower-case register d into X
STO.48 Store x in extended register 48

Registers may be printed out by the PRINT REG command (f⁻¹ REG) in modes UI and Plus.
Extended registers 00..99 are only printed when the paper tape printer mode is set to TRACE.

Extended registers 00..99 may be cleared by the command f CLx.
Registers A..e get cleared by the command f REG, along with the regular registers.

Note that f CLx may not be programmed by simply tapping the two keys in W/PRGM mode, as this would clear the program memory. Instead, enter the two keycodes – 31 and 44 – directly into the program listing in RUN mode. Alternatively, you may type the command name CLXT or CLEXT.

Another solution is to enter this key sequence (in W/PRGM mode):
f EEX CLx g BST DEL


Unlimited Register Arithmetic


RPN-65 Pro removes the HP-65's limitations on register arithmetic functions.

Register arithmetic supports both STO and RCL operations and works with any register (0..9, A...E, a..e, 00..99).

Examples:
RCL–7 Subtract value in R7 from X
STO.41 Store X in extended register 41
STO+.07 Add X to extended register 07
STO×E Multiply X into register E


Saving the Entire Stack

The command STO ENTER ("STO STK") copies the LastX register as well as the stack registers X, Y, Z, T to extended registers R.00 through R.04 (in this order).
Likewise, RCL ENTER ("RCL STK") retrieves LastX and the stack registers from the extended registers.


105 Additional Labels


With 105 labels in addition to those built into HP-65, you'll probably never run out of labels again.

Available labels are: A..E, a..e, 0..9, 00..99.

Every label may the target of a subroutine call by using the GSB command (f⁻¹ GTO).

To address a 2-digit label, insert a "+" after the command, followed by the 2-digit label number.

Examples:
GSB 9 Execute subroutine at label 9
GTO f E Go to lower-case label e
LBL+05 Define extended label 05 (note 2-digit number)
GTO+97 Go to extended label 97

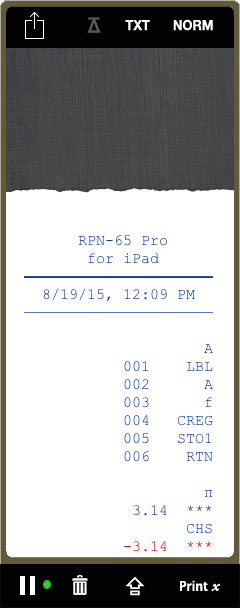
In modes UI and Plus, label usage may be printed by f⁻¹ LBL (see picture at right.)

The location (or locations, if used more than once) of each label is listed, followed by the number of unused labels.
With extended labels 00..99 (Plus mode), only the first occurrence in the program is shown. Unused extended labels are not listed.

Note
There is a subtle difference between using A and GSB A to call subroutine A. While the former searches for the first occurrence of LBL A beginning at the top of memory, the latter searches from the next program step. This applies to all labels A..E and a..e.


Additional Flag Commands


RPN-65 adds handy toggle and test commands to the flag operations.
All commands are invoked by the prefix key DSP.
  Command   Description
  DSP f SF1 (or SF2)   Toggle flag 1 (or 2), then test if set
  DSP f⁻¹ SF1 (or SF2)   Toggle flag 1 (or 2), then test if cleared
  DSP f TF1 (or TF2)   Toggle flag1 (or 2)
  DSP f⁻¹ TF1   Test if F1 is in the same state as F2
  DSP f⁻¹ TF2   Test if F1 is not in the same state as F2


Using the Paper Tape Printer


RPN-65's paper tape printer emulates the HP-97's printer and adds a few twists.
The tape can hold up to 999 lines; older lines are dropped.

When using the printer, whether you are in MAN or NORM modes (where you must press Print x) or in TRACE mode (where RPN-65 automatically prints results), printed numbers can be shown in any display format – fixed point or scientific notation. By selecting the display format, you also select the print format.

Numbers that you key in – that is, numbers that are not the results of operations – are also printed. When you key in a number with the Print Mode switch set to NORM or TRACE, RPN-65 does not print it until you change display format or press a function key. Then the number is printed exactly as you keyed it in. A number that you keyed in is not the result of an operation, and no asterisks are printed to its right.

When you have keyed in a number, there is one time that the RPN-65 will change its format before printing. If you have specified fixed point notation and the number keyed in is also in fixed point format (i.e., you have not pressed EEX), RPN-65 will attempt to align the decimal points for easy readability on your printed copy. It will do this in fixed point notation by printing the number that you keyed in in the specified format (if the number can be printed without truncating), adding trailing zeros if necessary. This feature permits you to key in numbers in fixed point notation and line up the decimal points in the printed record of your calculations.


Printing Modes

RPN-65 supports the HP-97's MAN, TRACE, and NORM printing modes:


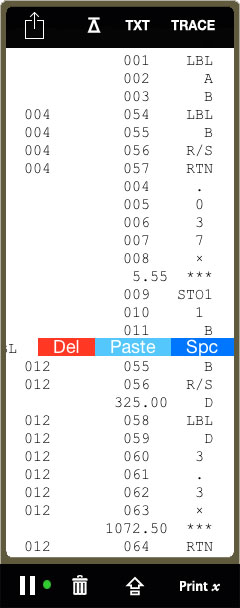
When running a program in NORM and TRACE mode, RPN-65 also prints information about subroutine levels (see second screenshot at right.) The number at the left indicates the step where program flow will continue when the next RTN statement is encountered. No number means program execution will stop with the next RTN statement. Nested subroutines (available in Plus mode) are displayed by indenting the step number according to the nesting level.

To advance the printer paper, tap the paper advance button at the bottom. Hold the button down to advance several lines.

To quickly scroll to the beginning or the end of the printout, tap the arrow button at the top.


Program Listing

With the calculator mode switch set to W/PRGM, the paper tape printer's Printx button gets renamed to P Pgm.
With the calculator mode switch set to RUN in modes UI and Plus, you can use the PRINT PRGM command (f⁻¹ CLx).

The currently stored program will be printed as follows:

Print Mode switch set to MAN:
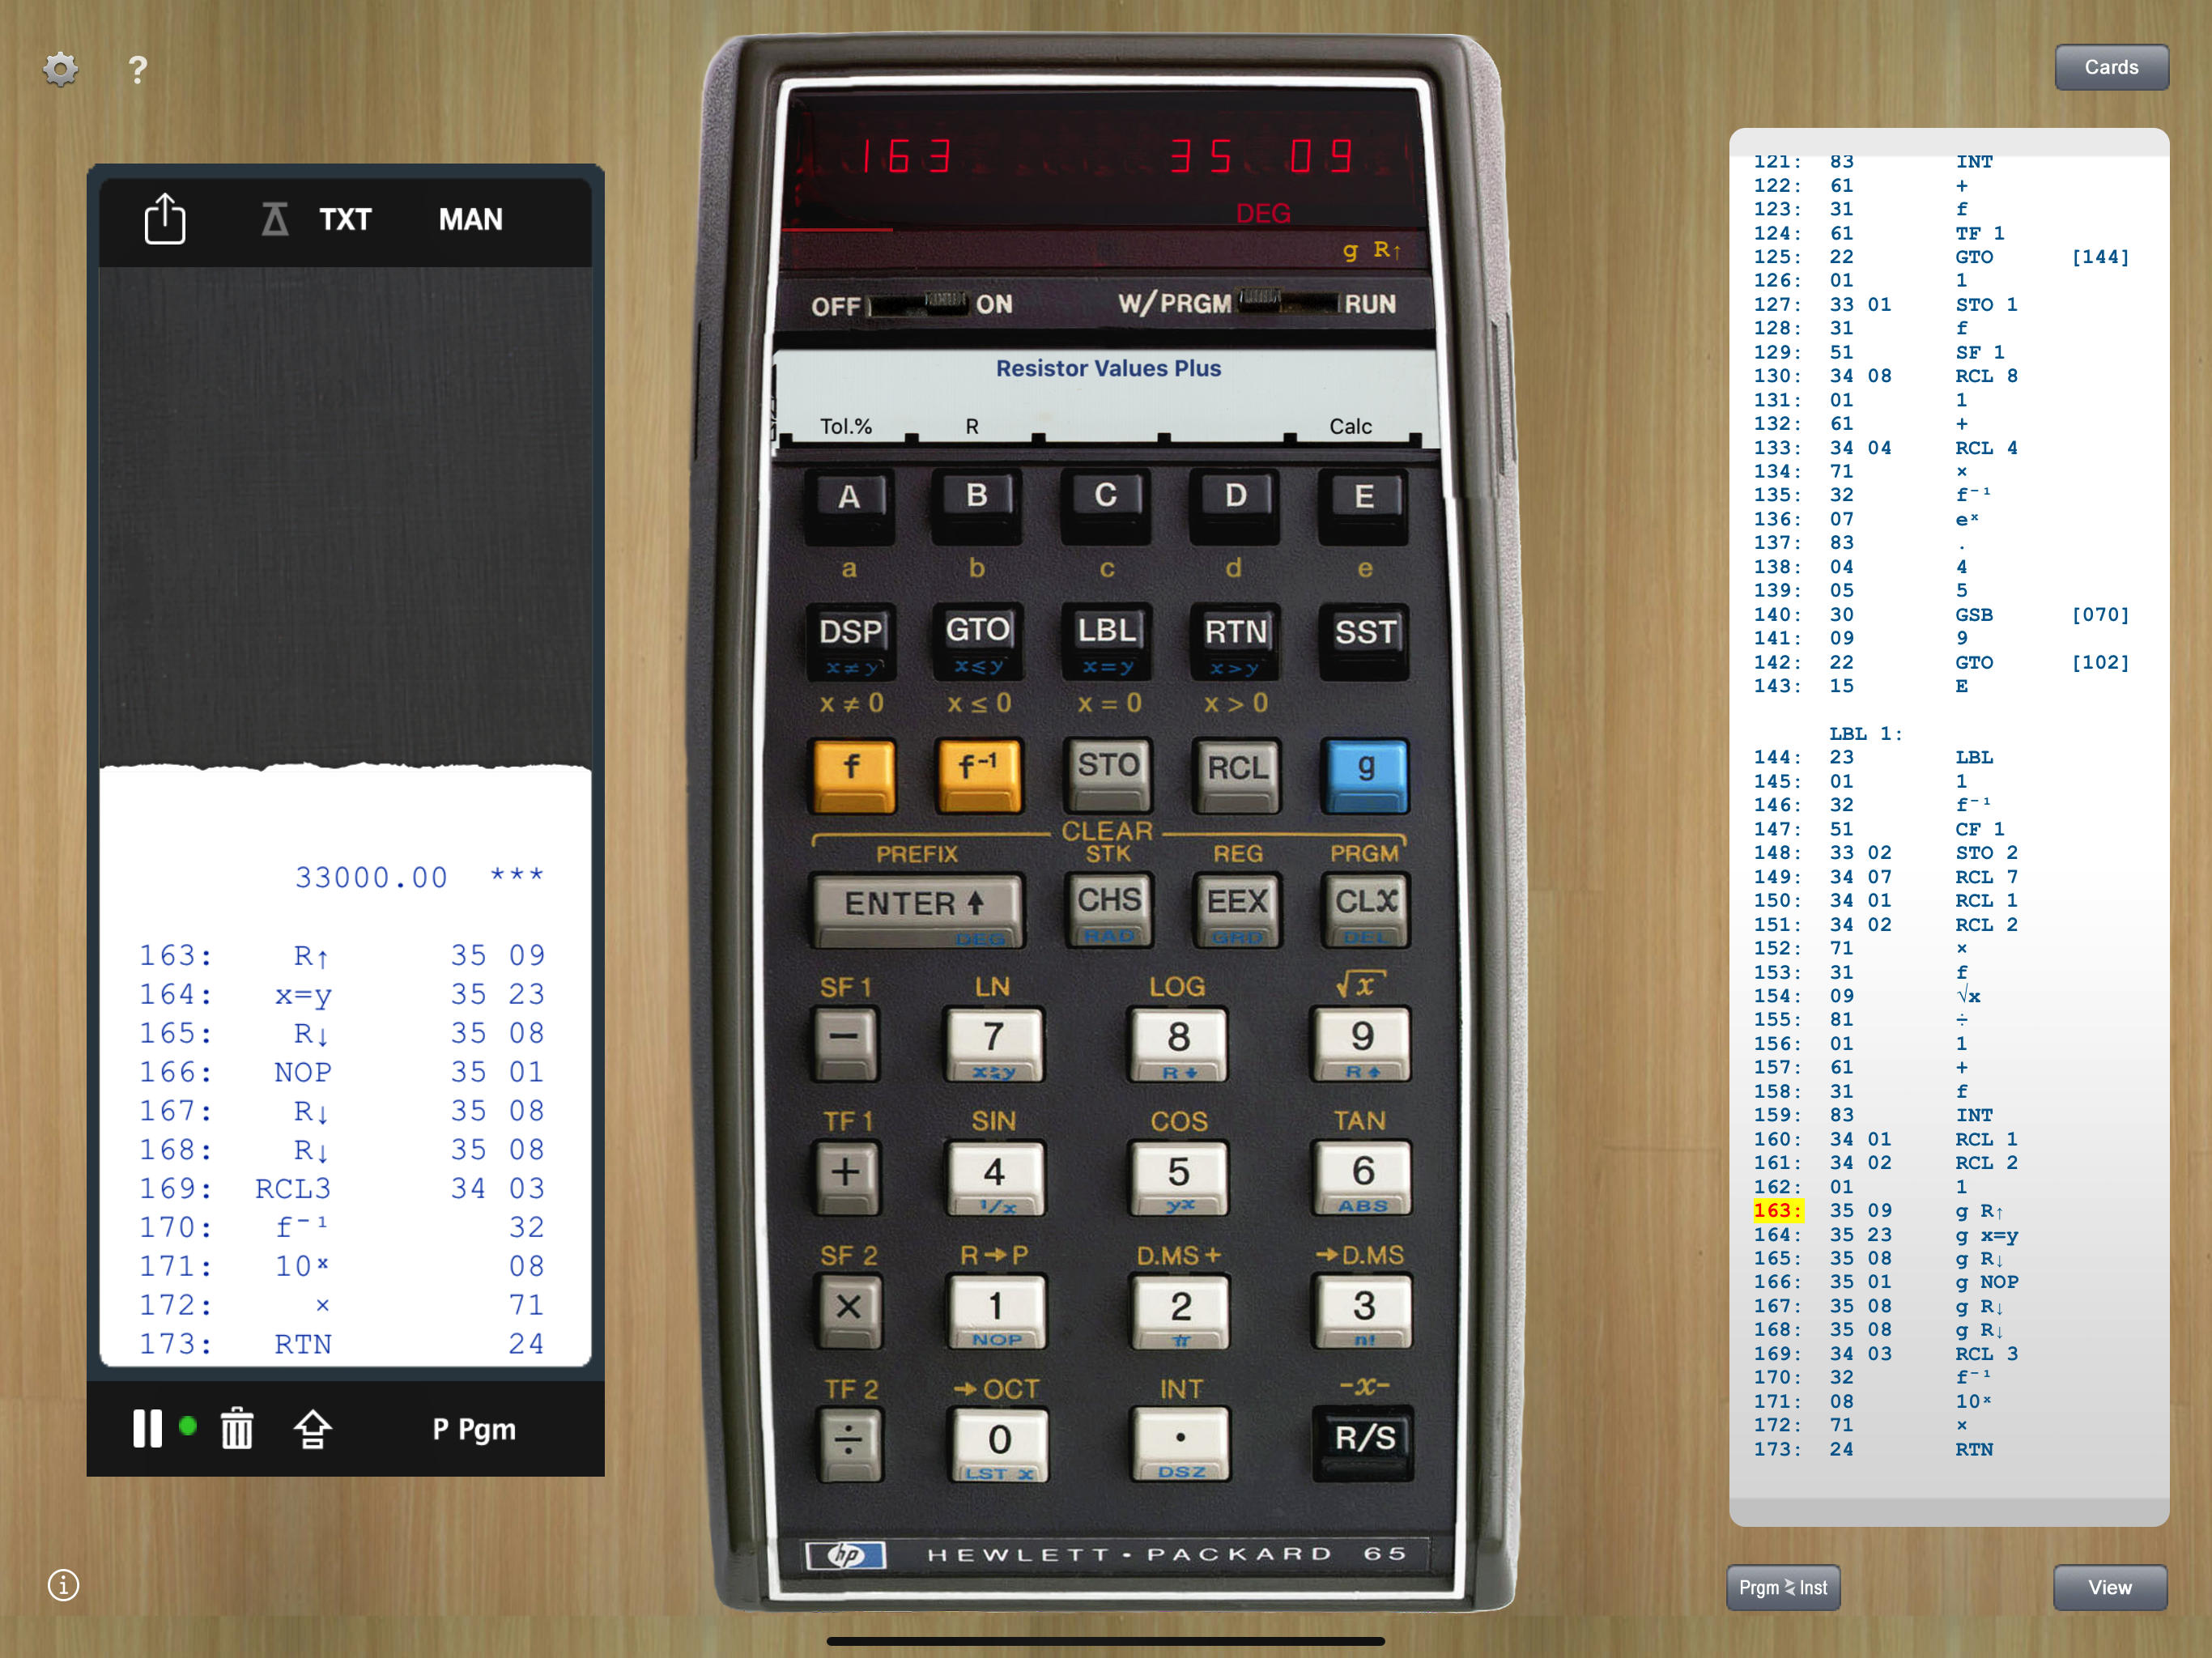
The printer lists step number, operation, and keycode for each step of program memory. The print range starts at the first non-NOP instruction from the current step and ends at the last non-NOP step in program memory (as defined by the current "Enhancements" settings.) All NOPs inside this range will be printed.

Print Mode switch set to NORM or TRACE:
The printer lists only the step number and instruction, omitting the keycode. This type of listing is useful for preserving a record of your program without the keycodes.
The start of the print range is defined as in MAN mode, but printing will stop on the third NOP in succession.

In Vintage mode, printing stops after each NOP command. The step counter is automatically increased, allowing you to step through program memory by repeatedly tapping the P Pgm key.

If Print Program is executed by a program, the listing starts with the first instruction in program memory not being a NOP.


Printing Display Value, Stack, and Registers

With the printer turned on and visible, commands like f⁻¹ REG, f⁻¹ STK and f -x- (available in UI and Plus modes) will execute much faster because values do not have to be shown on the display.


Changing the Ribbon Color / Printing Negative Results in Red

You may select a blue or black ribbon in Settings.
In addition, you specify negative results to be printed in red.

Editing the Paper Tape

Swipe left on a paper tape line to delete it. You can also insert an empty line above a line, or paste text created by the TXT button.


HP-65 Peculiarities


Back in 1974, the HP-65 was the first magnetic-card-programmable handheld calculator. Due to technical limitations, some characteristics seem rather odd in today's view. They did not appear in later calculator versions. As an example, notice that deleting step 100 of a program also deletes step 99.

It would make sense, for example, to assume that "one keypress = one program step". However, many 2-step instructions were merged into a single step, for example g NOP, g LSTx, STO/RCL 1 to 8 (but not 9!). In particular, the LBL function and the label name occupied two steps, which could lead to remarkable side-effects, especially when single-stepping and switching between RUN and W/PRGM modes.

A glaring deficiency was the absence of a back-step key. Single-stepping (SST) one or more steps too far by accident was best remedied by deleting and reinserting steps. Note that RPN-65 supports back-stepping in UI and Plus modes (press g SST).

If operated in vintage mode, RPN-65 faithfully simulates a number of these oddities. For example:


    For the following demonstrations, load the default programs by setting RPN-65's mode to "Enhancements Off" or "Fast", then flipping the power switch OFF, then ON.
    Delete the LBL E subroutine (steps 20 to 23), then recreate LBL E at steps 97 to 100 as follows: LBL E CHS RTN
    (Hint: Use GTO.96 in UI mode – or GTO.096 in Plus mode – to quickly access step 96, enter the code, then return to mode "Off" or "Fast".)


001:  23        LBL   
002:  11        A     
003:  35        g     
004:  04        1/x   
005:  24        RTN   

006:  23        LBL   
007:  01        B
008:  32        f   
009:  09        √x    
010:  24        RTN   
...

097:  23        LBL   
098:  15        E     
099:  42        CHS    
100:  24        RTN     


More operations to try out and explore:(RUN = switch to run mode, W/PRGM = switch to program mode)
(If you tried Example 3, restore the original sample program shown above first.)


   EXECUTE          |           DISPLAY           |   COMMENTS
____________________|_____________________________|_______________________________________
                    |                             |
   RUN 5 GTO E      |    5.00 W/PRGM        15-   |   Addresses step 99
                    |                             |
[Common start]      |                             |
1. RUN SST          |   -5.00 W/PRGM        42-   |   CHS
2. RUN SST          |   -5.00 W/PRGM    -   24-   |   RTN
3. RUN SST          |   -5.00 W/PRGM     00 00-   |   At top of memory


[Continuation 1]
4. RUN SST SST      |   -5.00 W/PRGM        11-   |   Executes LBL, A (no action)
5. RUN SST SST      |   -0.20 W/PRGM        04-   |   Executes g,4 (= g 1/x)
6. RUN SST          |    4.00 W/PRGM        24-   |   RTN	

[Continuation 2]
4. RUN SST SST SST  |   -5.00 W/PRGM        35-   |   Executes LBL, A, g (no action)
5. RUN SST          |    4.   W/PRGM        04-   |   Executes 4 (g-shift cleared)
6. RUN SST          |    4.00 W/PRGM        24-   |   RTN	

[Continuation 3]
4. RUN SST          |   -5.00 W/PRGM        23-   |   LBL (executes as NOP)	
5. RUN SST          |   -0.20 W/PRGM        11-   |   Executes A (entire LBL A subroutine)
6. RUN SST          |   -0.20 W/PRGM        35-   |   g (step 03)	
7. RUN SST          |    4.   W/PRGM        04-   |   Number key 4 (g-shift cleared)
8. RUN SST          |    4.00 W/PRGM        24-   |   RTN


Copyright © 2024. All rights reserved.