|
Running a program on the HP-65 is basically having the calculator press keys for you. Coupled with the ability to use results, conditions, counters and flags to decide on the program flow, quite sophisticated programs can be written (and have been written) for this machine.
Because a few years may have passed since you last wrote a program for the HP-65, here's a quick rundown on some of the most important features.
Program memory
You can store up to 100 key presses. However, this does not translate to 100 program instructions since most operations take two steps – a prefix key followed by the operation key. Some often-used operations are merged into a single step, e.g. RCL or STO 1..8 (but RCL 9 and STO 9 are not!), or stack manipulation.
You can single-step through program memory, but there is no backstep key. There is no indication of the current program step number; consequently, you can't quickly jump to any location in a program. One solution is to jump to a nearby label, e.g. GTO 7, GTO B, and single-step from there until you reach the desired step.
Registers
9 registers, R1..R9, are available. Note that use of R9 is somewhat limited, as the HP-65 needs it for a number of operations. The operation CLEAR REG clears all registers to zero.
Register arithmetic works only with the STO key. For example, you can multiply the display value into register 3 like this: STO × 3.
The instruction DSZ decrements the value in R8 and skips the next two steps if R8 is exactly zero. Note that a non-zero value less than 1 is not decremented.
Labels
Labels are steps in the program where the program flow can branch to (using the GTO command). 15 labels are provided: A..E and 0..9. The alphabetic labels are called by either the user pressing the appropriate user-definable key in the top row, or by a program executing the instruction A..E.
With no program stored in the calculator, keys A..E execute default functions like inverse of x or square root of x. These functions are stored in program memory when the calculator is turned on. They should be cleared (f PRGM) by the user before entering a program.
Interestingly, any label may occur many times in a single program. This works because branching to a label follows a simple rule: the label address to use is always the next occurrence of the label, starting at the current program position. The search wraps around program memory, that is, if the label is not found before the end of program memory, the search continues from address one. If still not found, program execution continues at step 1.
You can execute a GTO command interactively from the keyboard.
Flags, Conditionals
Flags may be used for making branching decisions. Two flags are available: F1 and F2. Either flag may be set, cleared, or tested for its state. When testing a flag for being set (f TF), if it is set, the two instructions following the test are executed, otherwise they're skipped. When testing a flag for not being set (f⁻¹ TF), if it is not set, the two instructions following the test are executed, otherwise they're skipped.
You can set a flag with f SF, or clear it with f⁻¹ SF.
Conditionals x ≠ y, x ≤ y etc. compare the value in X with the value in Y. If the condition is true, the two instructions following the test are executed, otherwise they're skipped.
Branching
GTO label causes the calculator to search downward through program memory (wrapping around to the top of memory if the end of program memory is reached) until "label" is found, then continue execution from there. If the label is not found, execution continues at step 1.
In addition, A, B, C, D, E, when used as an instruction in a program, call the subroutine stored under the associated label (LBL A, LBL B, etc.) These are not subroutines in the modern sense, as there is no stack holding return addresses involved. Instead, the currently active program pointer is put to rest and an invisible code (41) is inserted at the address following the subroutine command. Then, a secondary pointer is activated which will execute the subroutine. The next RTN command encountered will return control to the primary pointer, which will continue execution at the invisible code. The actual process is even more complicated, but the gist of this all is that only one subroutine level is available, and that only labels A..E can act as subroutines, but not the labels 0..9. (See the program "Secondary Pointer Interrupt", included with RPN-65 Pro, for an example making use of secondary pointer behavior.)
The search for a subroutine (A..E) always starts at the top of memory. If LBL A..E is not found, the subroutine call is simply ignored.
Note that if a program is started or continued with R/S, the first RTN statement encountered is ignored (except when a subroutine was called before the RTN.)
You can watch the current return address on the stack in the register view of RPN-65 (labeled RTN). If the address shows as —, the program will stop after executing RTN.
|
| |
|
|
Storing your program on a card |
| |
|
|
|
| |
|
|
1.
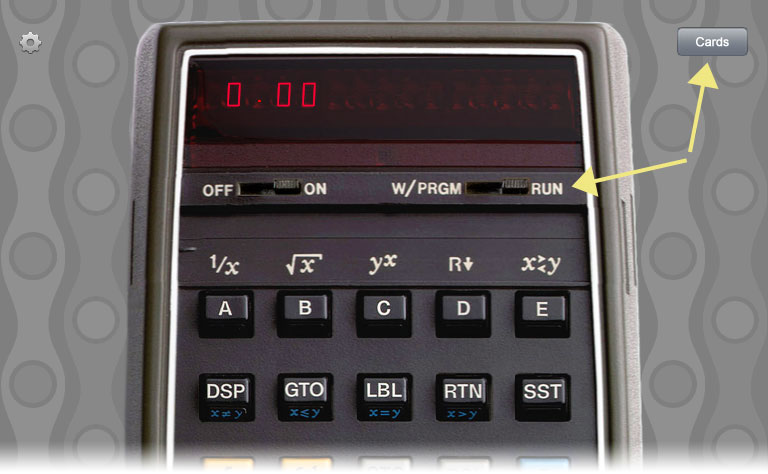
To prepare an empty card for a new program:
Set the mode switch to RUN.
-OR-
To store the program in the calculator on a new card:
Set the mode switch to W/PRGM. |
| |
|
|
 |
| |
|
|
|
| |
|
|
2.
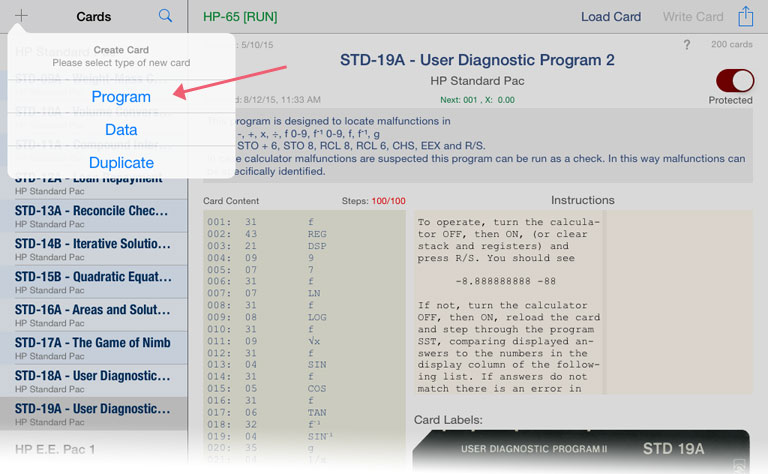
Tap the "+" button.
Specify Card Type "Program". |
| |
|
|
 |
| |
|
|
|
| |
|
|
3.
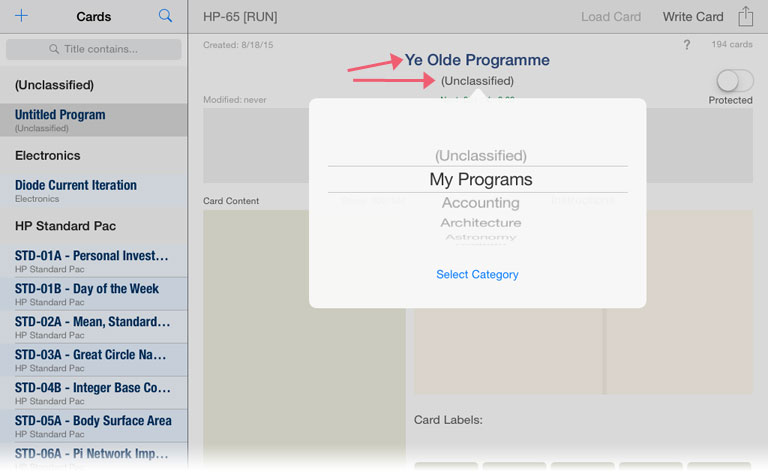
Tap the title to change it.
(Optional) Tap category to change it. |
| |
|
|
 |
| |
|
|
|
| |
|
|
4.
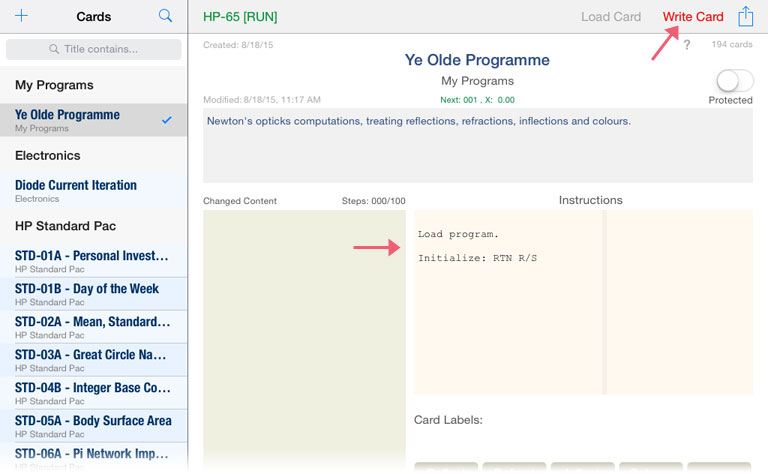
(Optional) Add more meta data (instructions, labels).
Tap on the red "Write Card" button. |
| |
|
|
 |
| |
|
|
|
| |
|
|
5.
When you're done (for the moment),
tap the blue "Load Card" button to return
to the calculator. |
|
| |
|
|
 |
| |
|
|
|
| |
|
|
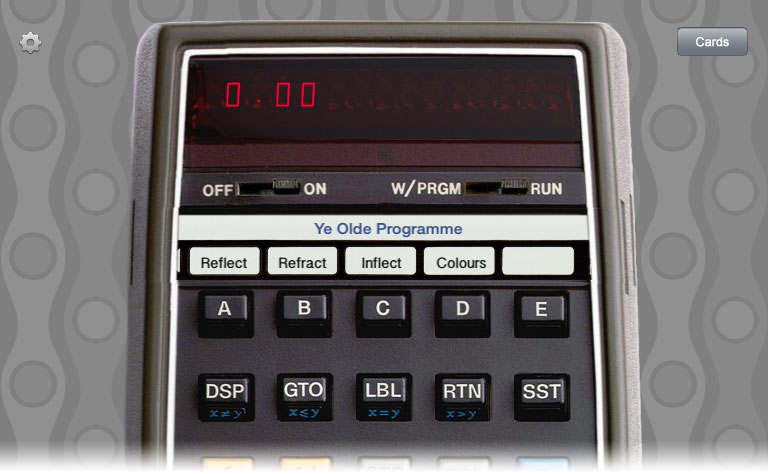
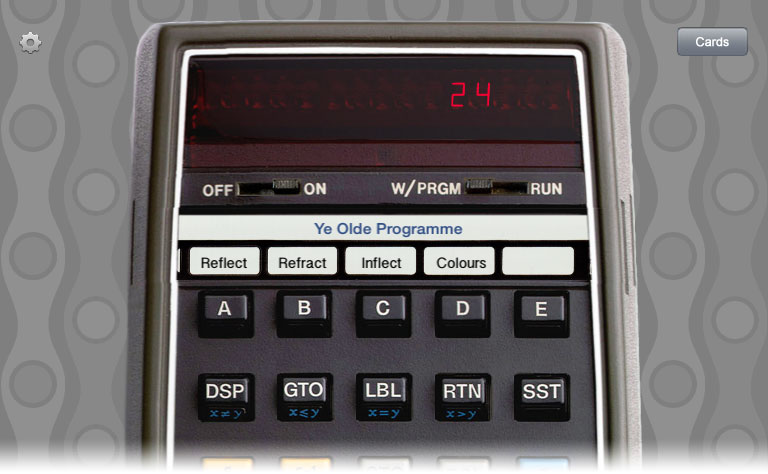
6.
Now slide the mode switch to W/PRGM.
Enter or modify your program.
When done (or at any time), tap "Cards". |
| |
|
|
 |
| |
|
|
|
| |
|
|
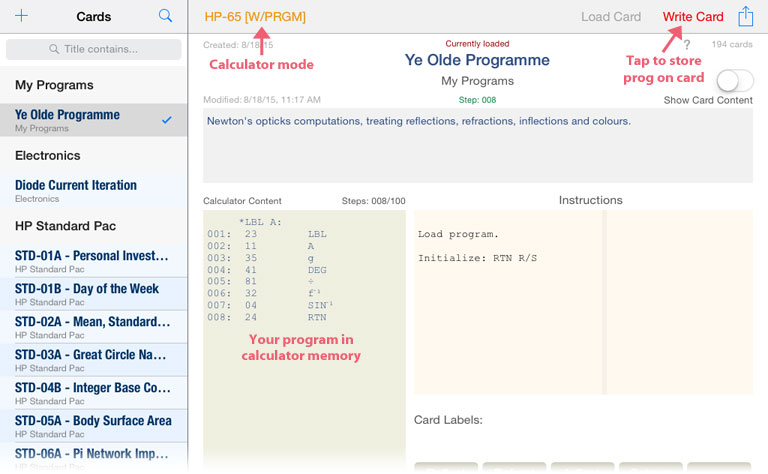
7.
Verify the program listing.
Tap "Write Card" to save any changes.
Tap "Load Card". |
| |
|
|
 |
| |
|
|
|
| |
|
|
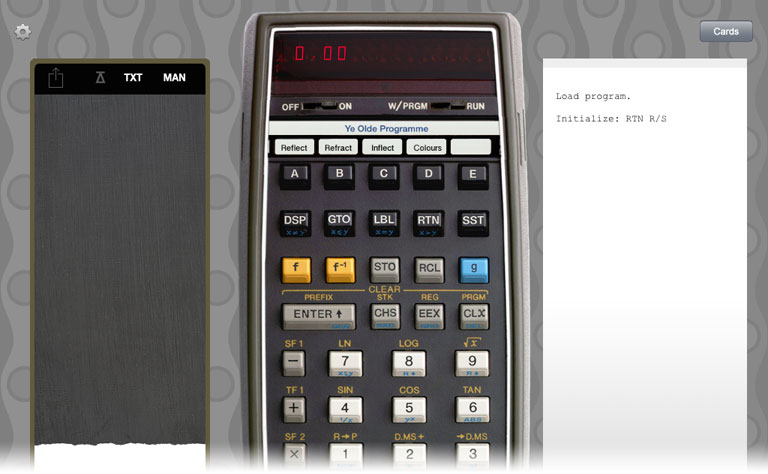
8.
Continue changing your program
-OR-
Slide the mode switch to RUN to use it. |
| |
|
|
 |
| |
|
|
Congratulations! Your program is safely stored now.
To make changes to your program, continue at step 6 (without clearing the program, of course). |
|


